Showing posts with label Sewing. Show all posts

Sunday, May 10, 2009

Mother's Day Apron


This year my Happy Mother's Day Gift was this cutesy reversible apron. Mom was thrilled! I won't bore you with the whole story (since it's kind of long), but she picked the materials out herself about two years ago, never knowing I would use them.
************************************
************************
Well! Since you seem to have some time, I might as well tell you what happened...

A while back Mom decided she wanted to sew herself an apron. Now, you must understand, my mother is not one who sews very often, doesn't like patterns and would rather do it her own way. But of course, she found a apron she liked; and to make it, she needed the pattern. So she bought it and the fabric for two aprons and put them away until my grandmother came on her once a month weekend visit.

Well, Gram came and they cut and sewed the first apron with success! The cherry apron looked (and still looks) adorable. Mother Dearest cut out the floral fabric for the second apron... and that's about as far as she got with that.
Now it's been two years and the apron cut outs and pattern have been sitting in a plastic bag... Mom has lost a significant amount of weight, so they'll probably not be used again.
But wait! Her very favorite daughter gets a wonderful idea. Why not size the cutouts down to the size that would fit her, since the patterns for the other sizes are still in the bag, and present to her the finished apron for Mother's Day?
So, the MIT re-cuts the fabric pieces, sews up the apron (with a little help over the phone from Gram on the shoulder straps) and packages it up for her Very Favorite Mom Ever.


Mom receives the gift and is very happy and surprised. She loves it! En fait, even as she sits and reads Hobby Farm Magazine at 8:48 PM, she is wearing it still. :)

Tuesday, April 28, 2009

My First Pillowcase Dress


Guess what everyone??? I have just made my very first article of clothing: a pillowcase dress! While I had to work out a couple of kinks in my sewing skills, the dress was pretty easy and turned out super cute.
One vintage embroidered pillowcase + two yards gross grain ribbon


+ this tutorial from EverythingSewing.net

=

~ One Lovely Pillowcase Dress ~

Thursday, January 29, 2009

Quilting Class


Remember the quilting class I mentioned on Monday? Well, Mother Dear and I went last night, and learned a good amount of ways to make quilt blocks. For Hanukkah I received this class, as well as some Dick and Jane material for a quilt I'd been eyeing. I can't wait to start! I learned how to make the quilt blocks I'll be using for this quilt at the class, so I'm pretty set to go. I'll keep you all updated on how it's coming as soon as I sew my first block!

Tuesday, January 13, 2009

Homemade "Superman" Capes

Remember how I told you about the gifts for Hanukkah I was giving? Well, here they are!


These cape costumes were a hit! All the children loved them, and still do. I learned a lot by sewing the "outfits", since I was still a bit unsteady at my sewing skills (not that I'm anywhere near perfect now!), and can't wait to start another project.

On the day after Halloween, my mom and I shopped the sale-throwing fabric stores, and that's when I found all this sparkly material...and came up with the idea to sew capes for gifts. I didn't exactly know how I was going to make them, but estimated how much material I would need for each child's cape, and went ahead and bought it.

It wasn't until December I started, as I had no clue how to make a cape, but once I did everything went fine. As you can see, I made head and wrist bands to go with the capes, and sewed metallic ric-rac on the cape and head piece to make it more costume-like.

Here are a few more photos snapped of my siblings in their garb:


Have a blessed day!

Thursday, December 4, 2008

Gum Drop Pillows


Here is my first sew-from-a-pattern project; Gum Drop Pillows! Since it's another first for me, and I greatly enjoyed the process, I thought you might like to hear how these pillows came to be, and see a few pictures.


I got the idea to sew them about a month ago when my mom and I were at Craft Warehouse. I was aimlessly wandering around the fabric area, when I saw some sample pillows sitting on a shelf. As soon as I saw them, I knew I just had to make one! After thinking about it for awhile, I figured I could make two pillows with coordinating fabrics, as holiday gifts for some friends of mine, who are sisters.

My mom and I ended up coming back a week later, to shop at the big Craft Warehouse yearly sale, and that's when I bought all my material and the pillow pattern (both of which were largely discounted!!). Since the store was crazy busy, and we knew the fabric cutting line would soon be extremely long, my mom and I ran (ran!) to look at fabric together. I quickly decided on the fabric for the first pillow, and Mom ran (ran!) to get in line with it. While she was waiting, I quickly looked for somewhat matching fabric for the second pillow. Before finding any, my eye caught the Cottage Romance fabric collection. I thought it was so cute, so I ran over and picked out my favorites for both pillows, and got them to Mom just in time before the sales lady cut the fabric I had previously picked. Whew!

The next day, Monday, I cut out all my fabric. I was a little worried I wouldn't quite like what I had gotten, as I made my final fabric choices in about 6.2 seconds, but I was extremely pleased when I had everything layed out.


Then, I spent a few days embroidering my friend's names onto the two, small octagon-shaped pieces, that would end up being on the tops of the pillows.


That Wednesday, my grandparents came to spend the rest of the week with us, so my grandma was able to help me tremendously in sewing all the pieces together. Thanks Gram!


On Thursday night, we got the pillows done. Here is Valentina's...


...and here's Galina's.


I love the way they turned out! Since the ladies live not too far from my grandparents, my grandma was able to drop the pillows off at their house the following week. And, from what I understand, the girls loved them too!


Friday, September 5, 2008

Lavender Sachet Tutorial


Don't you love it when you open your drawer and smell a wonderful scent? For the last couple of days I've been having lots of fun making these sweet smelling, and cute, lavender sachets that are perfect for making your clothes smell nice. They are very easy and quick to make, so I thought you might have fun with them too. :)

First, go out and clip your lavender.


Next, tie the stems together and hang them upside down to dry. You should let your sprigs dry for about a week.

While you're waiting, or when your lavender is dried, sew up your sachet. Cut out the size you want of some pretty fabric.


Then pin the right sides together.


Now, run down to your sewing area...


and sew your sides together. Remember, leave about an inch or two un-sewed so you can stuff the lavender inside.


Now, turn your sachet inside out, and start stuffing in the lavender pieces. I like the satchels more full, but depending on how much lavender you have, and how you like it, maybe you'd like to do less.


Sew up your little side...


and you're done! If you like, you can add some decoration. Ribbons are fun. Just tie them on!


I like buttons too, so I did both.


I love how my sachet turned out! If you make one, or maybe a few, let me know how yours do. I'd love to hear. :)

Saturday, August 9, 2008

Becoming a Seamstress

So, I'm finally getting around to blogging about my sewing class like I said I would! I've got a lot to say on this subject. :)
Well, I guess I should start by telling you that for the past three or four months I have been trying to learn to sew. Mother Dear (loveliest women) has bought me an eBook through Biblical Womanhood for young ladies called I Can Sew - An easy step-by-step guide to teach yourself to sew By Gretchen E. Smisor, to be my sewing teacher, and I have had sewing help from my grandma when she comes to visit once a month.
Although Gram and I Can Sew was starting to teach me the basics of sewing, I was still having problems. After going to the sewing class, I now see that I didn't really understand the sewing machine. To be visited by a "live instructor" once a month to fix it for me and to show me how to do whatever it was the right way, wasn't enough. So, Mom signed me up for a two day beginners sewing camp at a sewing shop down town. I loved it.

On the first day I got to make a little pillow with a pillow case to match. I couldn't believe I had actually completed two sewing projects in two hours! Normally I can't even get one done in double that amount of time.
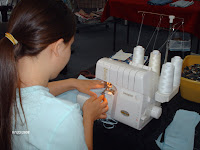
Mother Dear (loveliest of women) was at the class with me, and took a few pictures. Here I am on the first day.


On the second day we made a little hand purse and a bag. Both projects came out wonderfully! The hand purse was fun because we got to surge our names on the front. It was my first time using a surger, and was pretty amazed at how it worked! All I had to do was choose my type of lettering, spell out my name on the touch screen and press go. That needle certainly knew what it was doing! Although you can't see it in the photo, my name turned out lovely.

I think the bag was my favorite project. I feel like I learned a lot while I was made it, and is the thing I have used the most.

I got to use the bag just that night, when we drove over the mountains, for my books, CD player and CD's to help pass all the time we spent driving. It was fun using something I sewed myself!
The instructor was great. She explained things very nicely and really knew what she was doing, which was much needed in my case! The whole class was wonderful and encouraged me in sewing. I have all sorts of things I want to make now!